Let’s get straight to the point: washing makeup brushes involves simply wetting the bristles with warm water, applying a mild soap or baby shampoo, rubbing in circular motions until the water runs clear, and then laying them flat to dry. That’s all there is to it.
Now for the awkward part. Almost no one does it as often as they should, and it’s not out of laziness: no one told us that stiff bristles, blush that won’t blend, and those breakouts on our chin all stem from the same cause. It’s not your brush, and it’s not your skin. It has to do with the last time you washed it.
What gets stuck to your brushes when you don’t wash them?
Makeup residue, natural skin oils, dead skin cells, dust, and bacteria. All of that accumulates between the bristles and then goes straight to your face.
On the skin, you’ll notice breakouts and clogged pores, right where you press the brush the hardest. If your skin is reactive, irritation will appear for no apparent reason (and then you’ll blame the new product when it’s really due to the brush you’re using to apply it).
And the result: the blending becomes murky, because a saturated brush mixes today’s shade with last week’s. If you also have active acne, each stroke moves bacteria from one area to another.
How often to wash your brushes depending on what you apply with them
The American Academy of Dermatology recommends washing them every 7 to 10 days. Yes, every week and a half. If that sounds like too often, welcome to the club. In practice, it depends on what product you use on each one.
- Foundation brushes, concealers, and cream products : Frequency: once a week, plus a quick clean after each use. Why: they accumulate the most oily product, and oil feeds bacteria.
- Brushes for compact powder, blush, and bronzer. Frequency: every 15 days. Why: powder doesn’t stick or degrade as quickly as a cream.
- Eyeshadow and eyeliner brushes. Frequency: once a month. Why: for occasional use and minimal contact with the skin.
- Makeup sponges and beauty blenders. Frequency: After each use. Why: They are porous and absorb everything.
The realistic rule, the one you’ll actually follow: if you use it daily, don’t go more than two weeks between uses. And if you’re not sure what each type of brush does, that’s how you figure out which ones belong in the weekly group.
Practical example: a brush like the Shaina B Miami Blush Brush used for blush: washing it every 15 days is fine.
With liquid foundation, it varies depending on the type of foundation you use, because creamy ones leave residue faster.
What to use to wash your brushes (and what you already have at home)
You don’t need to buy anything to clean your makeup brushes today. We’ll tell you about options here, from the best to the most improvised:
- Makeup brush cleaner. A specialized product that dissolves pigment without drying out the bristles. The safest option for expensive brushes.
- Baby shampoo. A classic for a reason: gentle, inexpensive, and you might already have it in your bathroom.
- Mild liquid or bar soap. Neutral, without exfoliants or strong fragrances.
- Dish soap. Only for brushes with a lot of base coat and occasionally; it degreases very well and therefore dries them out.
Regarding the olive oil hack: yes, it does dissolve the cream, but it leaves a greasy film that you still have to remove afterward. It works as a preliminary step, but not as a standalone method.
The accessory that changes the experience is the silicone glove or mat, because its texture draws the product out from the center of the bristles. A brush cleaning glove like the Sigma Spa Express Brush Cleaning Glove does this, although the palm of your hand works just as well.
What you should never do: pour boiling water, pure alcohol, or acetone on the bristles.
Natural fiber brushes are the most delicate. And be careful with dense face brushes, like the Love + Craft + Beauty Favorite Face Brush: they almost always require a double rinse.

The Zote soap trick: what nobody tells you
Yes, that pink soap from the laundromat. The one for washing uniforms.
The trick has been circulating among Mexican makeup artists for years and has become a trend on TikTok, so the question arises naturally: does it really work?
It works, with some nuances. It’s a laundry soap, more alkaline than a neutral soap, and it removes product with a power that no baby shampoo can match.
The downside is the same: that power is harsh on the bristles. It works better with synthetic bristles than with natural hair, and you have to rinse until there’s no trace of soap left, because the residue is what makes them stiff.
Our position: Use it when a brush is heavily saturated with foundation, not every week or on your favorite brushes. If you don’t have Zote, Lirio soap does the same job.
How to wash your makeup brushes step by step
With that clear, here’s how to do it step by step:
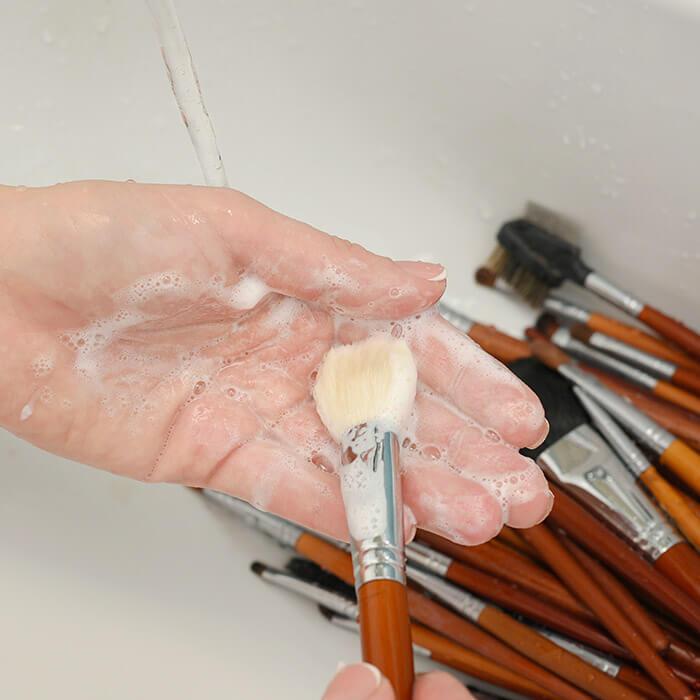
- Moisten only the bristles with warm water, with the tip pointing down and the handle pointing up.
- Take care of the ferrule, that metal part that connects the bristles to the handle. Never get it too wet.
- Apply the soap to the palm of your hand or to the silicone mat, never directly onto the brush.
- Rub in gentle circular motions until foam appears and the water stops being colored.
- Rinse with the brush tilted downwards, repeating until the water runs clear.
- Drain with a clean towel, pressing without twisting, and reshape with your fingers.
Step 2 deserves its own paragraph because almost no one explains it. Inside the ferrule there’s glue, and it’s the only thing holding the bristles in place. When water gets in there repeatedly, it softens, and the bristles start falling out one by one. It’s not that the brush was bad; it’s that you soaked it completely.
If you have a set of several brushes, wash them all at once. Having them ready to use will make applying makeup easier, both for everyday use and when you need to do a professional makeup look at home.
Before we continue: since you’re already in cleaning mode, take the opportunity to replace what’s no longer working.
Drying: the step where most people ruin their brushes
Here’s the most worrying fact: if you stand them upright in a glass with the bristles facing upwards, you’re doing exactly what ruins them. The water runs down, pools in the ferrule, and softens the glue.
There are only two correct positions: horizontal on a towel, with the tips sticking out over the edge of the table to allow air to circulate, or hanging with the bristles facing down.
Timing helps: wash them at night, and they’re ready in the morning. It’s one of those self -care rituals that takes ten minutes but feels like an hour. The most important thing is to do it and be consistent.
Express cleaning between washes
If you’re wondering how to quickly clean your makeup brushes, there’s a solution, and for everyday use, there’s spot cleaning: a brush cleaner spray or a drop of micellar water on a clean towel (a tissue also works, although it leaves lint). Wipe the brush in a zigzag motion until it stops releasing color, and that’s it! Less than a minute!
It’s useful for switching between different shades of eyeshadow without messing up the gradient, and for refreshing your blush brush between uses.
What it doesn’t replace: a thorough wash with soap and water. Express cleaning removes surface dirt, not the grease that’s already built into the bristles.
Mistakes that shorten the life of your brushes
Quickly, because these are the ones we see most often:
- Submerge it completely. You know what happens to the ferrule.
- Scrub vigorously against rough surfaces. This will permanently splay the bristles.
- Very hot or boiling water. It instantly deforms synthetic fibers.
- Drying them standing up with the bristles facing upwards. Mistake number one.
- Dry them with a hairdryer. Direct heat shrinks and cracks them.
- Storing them damp in a drawer or in the bathroom. Trapped moisture, mold.
- Sharing them without disinfecting them. Everything passes from one person to another. (It’s very important to disinfect both for personal use and for shared use. This way you can even prevent infections like conjunctivitis, for example).
How to know when it’s time to change a paintbrush
And when is it no longer worth persisting? The signs: bristles that fall out with each use, shape that doesn’t return after washing, rough texture against the skin, odor that doesn’t go away even after washing, bristles that are permanently splayed or bent.
A well-cared-for brush lasts for years, which is why the ritual is worthwhile. But when it’s time to renew, building your makeup set doesn’t mean overspending.
There are essential brush sets like The Essentials: Face Collection by Half Caked that are a great starting point, whether you’re looking to refresh your brushes or buy your first ones.
Clean brushes, new makeup routine
Your brushes are ready. Now all you need are some new products to try out with them!
All without going from store to store comparing prices and without committing to a full-size product you’re not sure you’ll like. That’s the point of the Glam Bag: try before you commit.
Frequently Asked Questions
Can makeup brushes be washed in the washing machine?
No. The drum deforms the bristles, and the water gets directly into the ferrule. They come out clean, but ruined. Always wash them by hand.
What happens if the metal part of the brush gets wet?
Nothing to worry about if it only happened once. The problem is repetition: the water gradually softens the glue that holds the bristles together. If this has already happened, dry it immediately and lay it flat.
Can I use micellar water to wash my brushes?
For quick cleaning, yes; for deep cleaning, no. It dissolves surface makeup, but not the grease accumulated inside the bristles.
Should new brushes be washed before use?
Yes, and almost no one does it. That first wash removes loose fibers and factory residue, and softens the bristles from the very first use.
How do I disinfect my brushes if I shared them with someone?
After a normal wash, a spray cleaner with alcohol on the dry bristles is sufficient. Never soak it in pure alcohol: it dries out the fibers and makes them brittle.